
- Go to Start > Settings > Disk

- Click on Disk Mode

- Check the Enable Raid Box

- On this box, press Okay

- Enter the admin username and password of the recorder
- The recorder will then reboot

- The recorder will then reboot
- After it boots back up, go back to the Disk Menu
- Nothing will appear in the Disk Management tab
- On the top gray bar, click on Physical Disk

- Select the drives that are going to be a part of the RAID
- Note: On the right hand side, you can set one or multiple drive to be a Hot Spare. This drive and its storage will not become a part of the RAID and wait in standby if a drive goes down or fails.
- Click Create Array on the bottom right

- Enter Array Name, and select RAID Type
- RAID Types:
- RAID 0 - Increases read/write performance by accessing multiple drives simultaneously. No Redundancy.
- RAID 1 - Data is duplicated on two or more drives, creating an exact copy.
- RAID 5 - 3 drives minimum. Data is distributed across all drives. Provides redundancy and improved read performance compared to RAID 1.
- RAID 10 - 4 drives minimum. Essentially RAID 1 and 0 combined. Provides better performance and redundancy than RAID 5.
- Click Add

- RAID Types:
- Click OK when the question is prompted
- Enter the admin username and password of the recorder


- Enter the admin username and password of the recorder
- The RAID Array details will show in the Array Tab
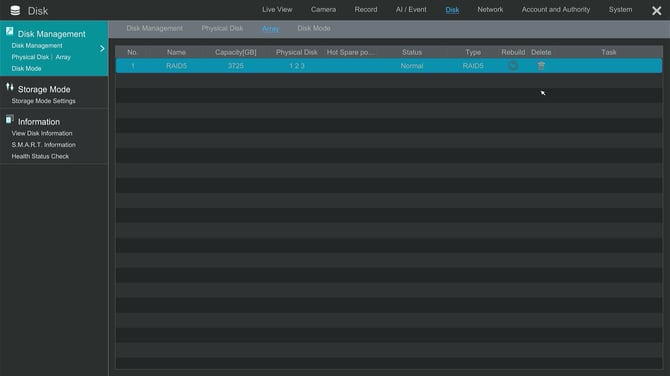
- The RAID Array will appear as one disk in the Disk Management tab
- You can check the status of each drive in the Physical Disk tab

- You can check the status of each drive in the Physical Disk tab
- RAID Rebuilding
- If one of the disks fails, the disk indicator on the front panel will turn red. A warning notification will pop up if the relevant HDD exception alarm is set.
- Replace the defective drive and rebuild your RAID.
- Click the circle in the Rebuild Column
- Click OK
Initial submission Date: July 16, 2025

Article authored by: Christopher Cataldo, Technical Support Lead