How to configure and utilize the arm/disarm feature of a Speco Blue Recorder
This guide goes over the steps required to configure and utilize the arm/disarm feature in the Speco Blue Recorder, as well as from the Speco Blue app.
- First, access the Settings menu of the Speco Blue Recorder.

- Once the Settings menu appears, please select the AI / Event page. That should automatically open the Event Notification > Alarm Out page.

- On the left-side of the screen, there should be an option called System Disarm. Please select the System Disarm option.
- At the top of the System Disarm page, ensure the check boxes for both Alarm Host and Remote Client are both enabled.
- Alarm Host will allow the physical relays on the back of the recorder unit to act as a hardwired Arm/Disarm switch. The Input Sensor option determines which relay will act as the switch.
- Remote Client will allow the Speco Blue App to configure and utilize the arm/disarm features of the recorder unit.
- Select the option for Add located on the right side of the screen.
- At the top of the System Disarm page, ensure the check boxes for both Alarm Host and Remote Client are both enabled.

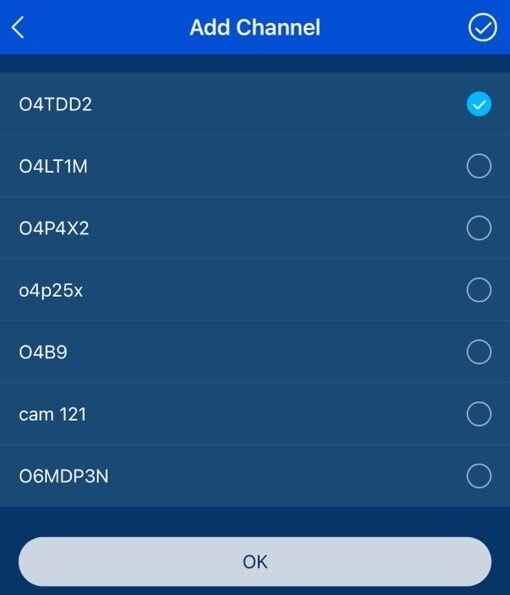
- The Add menu that appears will list every camera, sensor and virtual alarm available to recorder unit. Please select the options that need to be armed/disarmed on command.
-
- Select OK once complete.
-
In this example, the Digital Deterrent siren and flashing light function will be disarmed.

- The previous System Disarm page will appear. Now select Configure on the newly added camera/sensor/virtual alarm.

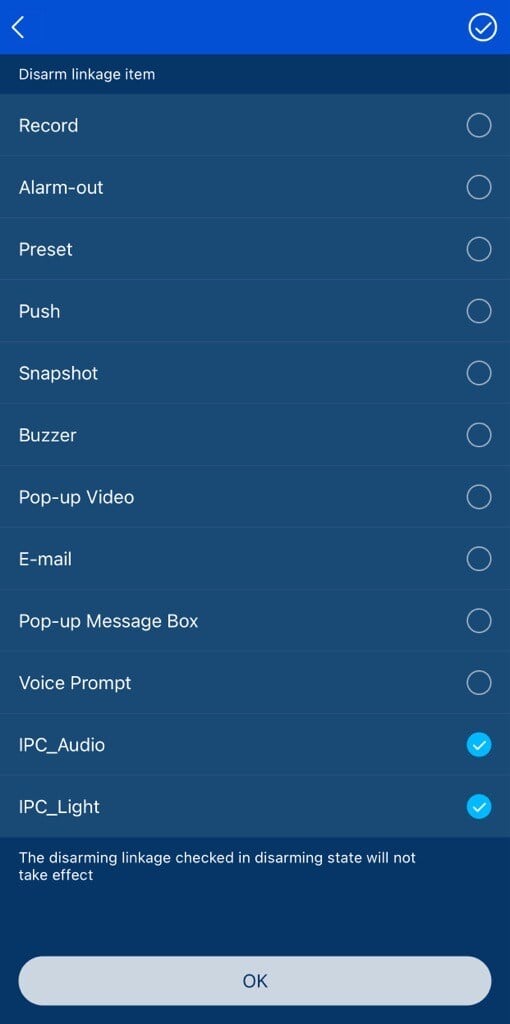
- The Disarm Link Item page will appear. On this page, select the options that need to armed/disarmed on command.
- Select OK once complete.

Only the O4TDD2 / O4TDD2M / O4BDD2 / O4BDD2M can have their light and siren disarmed. All other digital deterrent cameras are incapable of this function.
- Back to the System Disarm page, the selected parameters should all be visible from the bottom portion of the screen.
- Select Apply at the bottom right corner to save the configuration.
- To Disarm the configured alarms, select the One Key Disarm button in the middle of the page.
- The Status will change from Arming to Disarming. The One Key Disarm button will change to read Close Disarm.
- Select Apply to confirm the disarming of the alarms.
- The Status will change from Arming to Disarming. The One Key Disarm button will change to read Close Disarm.
- To Arm the configured alarms, select the Close Disarm button in the middle of the page.
- The Status will change from Disarming to Arming. The Close Disarm button will change to read One Key Disarm.
- Select Apply to confirm the arming of the alarms.
- The Status will change from Disarming to Arming. The Close Disarm button will change to read One Key Disarm.

- Opening the Speco Blue app on a mobile device, the Live screen should be the first to appear. In the top right corner, a button can be found that looks like two rectangles. Please select that button.

- That button will open up the Server List of the app. Please select the recorder unit in question by pressing the Play button underneath the recorder unit. This will pull up the live video of the recorder unit.

- Back to the Live page, the top half of the screen should contain live video, the bottom half will contain some options for configuration.
- Please swipe left on the bottom half menu. This will open the Arm/Disarm menu.

- On the page that appears after swiping left, a shield symbol will appear. This is where the system can be armed/disarmed.
- Please select the smaller shield button towards the top-right corner.

- If the alarms have been configured locally at the recorder unit, confirm that the settings set in the recorder have transferred correctly to the Channels or Sensor page.
- If the settings are displayed properly, exit the page and return to the Live view with the shield symbol displayed.
- If the alarms have yet to be configured, at the top of the page, select Channel if a camera alarm needs to be configured. Select Sensor if a sensor or virtual alarm needs to be configured.
- Select Add at the bottom of the page once the desired setting is selected.

- From the Add Channel/Sensor menu that appears, select the camera/sensor/virtual alarm that needs to be configured.
- Select OK at the bottom of the page to confirm the selection.

- The One Key Disarm Setup page will reappear with the previously selected channels/sensors added to the list.
- Select the added camera/sensor to configure it.

- The Disarm Linkage Item page will appear. Select the options that need to be armed/disarmed on command.
- Select OK at the bottom of the page when complete.

- Exit the One Key Disarm Setup menu once all desired channels/sensors have been configured and return to the Live screen with the shield symbol displayed.
- Tap on the shield icon to change the Armed/Disarmed state. A message of confirmation will appear each time. Please confirm the change.
- If the alarm is armed, the shield will be blue and read "Alarm is turned on. Click to disarm."

- If the alarm is disarmed, the shield will be orange and read "Protection has been withdrawn. Click to Restore."

Initial submission Date: September 12, 2024

Article authored by: Frank Bondietti
